10.28.2007

My Second Mac

I purchased a used Power Mac G4 dual 867Mhz a few weeks ago and I have already outgrown it:

  • The Power Mac has four fans (two 60x25mm, one 60x10mm and one 120x58mm) in it and together they make an low hum that is not pleasant to hear while I am trying to go to sleep (the computer is in my bedroom)
  • The G4 cannot run certain applications such as Photoshop CS3, Parallels/Bootcamp/VMWare Fusion (to run Windows), etc. (Note: I do not think that the latest build of Parallels [5160] plays well with OS X 10.5 Leopard!)
  • The G4 cannot handle Photo Booth (with my Logitech Fusion Webcam)

I decided to look at the Mac Mini systems (I don't need an iMac with integrated screen and the Mac Pro systems start at $2499!).  Currently there is a Core2 Duo 1.83Ghz system for $599 and a Core2 Duo 2.0Ghz system for $799.  I checked with a sales guy at Fry's and he found an open box older Core2 Duo 1.66Ghz system- for $332.49! The system (originally $499) a slower CPU, less memory (512MB) and a smaller hard drive (60GB)- but it is still $260 cheaper than the lowest priced Mac Mini system that is available.  Since I had every intention of upgrading two of these in any Mac Mini system I purchased I decided it was a dealt that was way too good to pass up! (there were two open box 1.83Ghz systems for $540 but 170Mhz was not worth $208 to me).

macmini_01_a

 macmini_04_ar

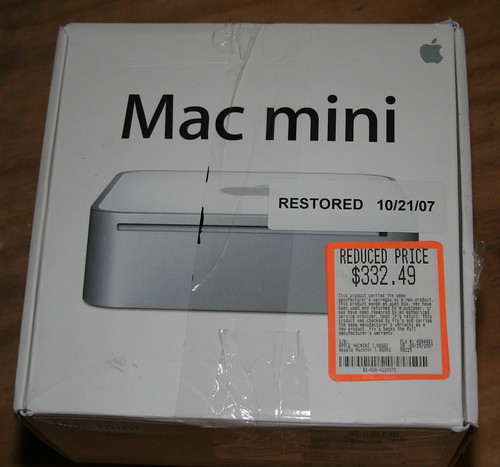
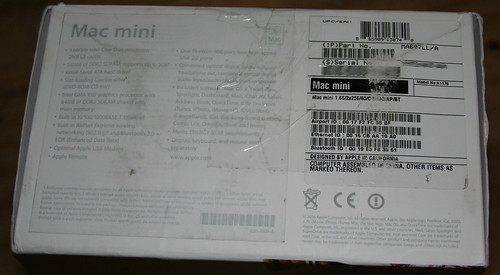
I later found out that it was missing the CDs and the apple remote (for Front Row).  I inquired with the sales guy but he said that I would have to talk to the customer service desk to see what they could do.  If the system doesn't work this would also be a good excuse to return it- so I decided to wait and see how it worked before I began this endeavor. Note: I found downloads of 10.4 (and 10.5) on UseNET so I am good as far as DVDs.  I also managed to win an auction for an Apple remote for $5.99 + $2.00 SH on eBay (I ended up getting three in the same auction).

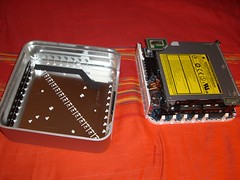
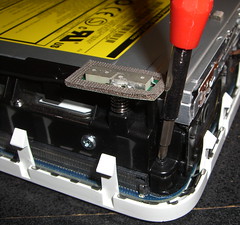
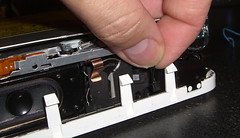
After getting the system home I cracked it open using the 'network wire' option instead of a putty knife.  It took about 30 minutes to get the wires in and the case open:

macmini01

macmini05 macmini03

macmini02 macmini04

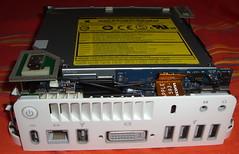
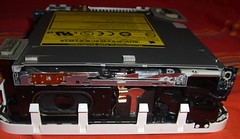
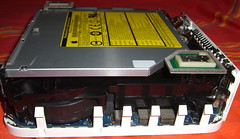
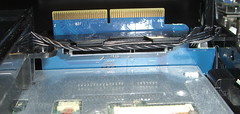
There are then four screws that must be removed to access the CPU/Memory.  The wifi connector must be removed on one corner to allow access to the screw underneath; this pops off after pressing the plastic clips in:

macmini06 macmini07

macmini08 macmini09

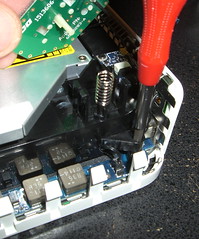
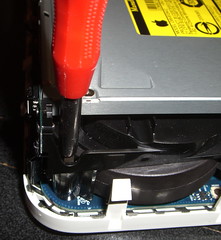
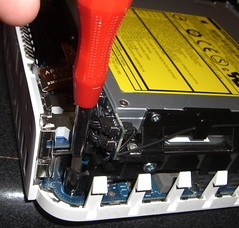
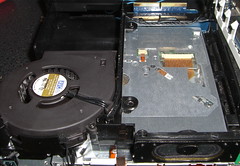
After these are removed, there is a small connector that must be unplugged in the front to remove the DVD assembly:

macmini10 macmini11

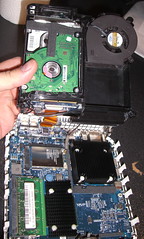
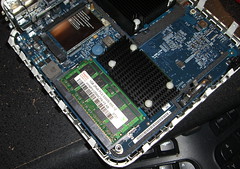
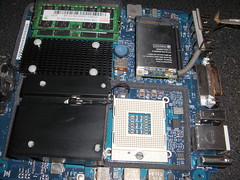
This give access to the SODIMMs:

macmini12

The hard drive is contained in the top section directly beneath the DVD assembly:

macmini22

macmini14 macmini13

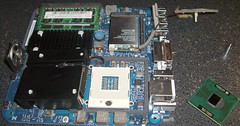
The CPU under an aluminum heatsink (cooled by the blower in the top half):

macmini15 macmini18

macmini17macmini16 

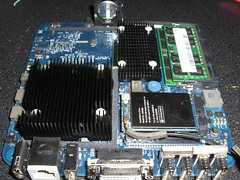
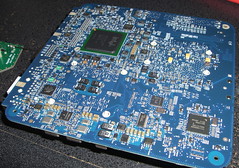
The bottom of the motherboard has a lot of SMT circuitry that would not be fun to repair if damaged- so be careful!

macmini20  macmini19

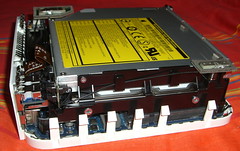
Before putting the top of the system back on, be sure to power it on and make sure it works- and be sure you didn't leave any parts out (like the foam baffle that goes on the bottom of the hard drive- d'oh!):

macmini21 macmini22

I found a site with more info on removing the motherboard.

Notes:

  • Maximum memory on the Mac Mini is 2GB; this is accomplished by a matched pair of 667Mhz PC2-5300 DDR2 SODIMMs (about $55 from NewEgg)
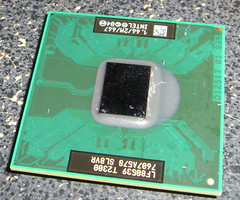
  • The Pentium M must be a Yonah or Meron with 667Mhz FSB core  to work with the Mac Mini System (i.e. I doubt the Meron with 800Mhz FSB Pentium M will work correctly):
    • T5500 - Core 2 Duo 1.66Ghz, 2M L2
    • T5600 - Core 2 Duo 1.83Ghz, 2M L2
    • T7200 - Core 2 Duo 2.00Ghz, 4M L2
    • T7400 - Core 2 Duo 2.13Ghz, 4M L2; upgrade website
    • T7600 - Core 2 Duo 2.33Ghz, 4M L2; upgrade website
  • The hard drive is a 2.5" SATA disk (up to 250GB!)- there are recommendations to use an external FireWire drive to increase performance; just note that you cannot run BootCamp (at least in OS X 10.5) from an external hard disk!

xBox 360 Elite Holiday Bundle; looking for a Falcon?

I finally found an xBox 360 Elite Holiday bundle in stock (at a GameStop) and broke down and purchased one- assuming that since these guys have been so out of stock for so long that the new ones must be the falcon chipset: I think I was wrong.

After getting the box home and doing a more detailed examination I noticed that the box had been resealed: There was a large clear circle sticker covering a smaller version that had obviously been cut:

xbox360_01

I did a thorough of the label on the side; it looks like the 'Team: TMEM' is just a sticker placed over an older sticker- and I could faintly make out 'LOT NO: 0728' on the prior sticker (click on the image for a larger picture).  I believe the first batch of Falcon chipset found in the Halo collectors edition was 0737.

xbox360_02

xbox360_03

My fears were confirmed when I checked the serial number for the manufacture date- it was 2007-07-17- this unit was manufactured three months ago (before the Falcon chipset were even out):

360_date

I checked the gutty-works of the system with a bright flashlight and there are three copper tubes (heat pipes) on the heat sink- So I have a Zephyr chipset that was reboxed to add the game bundle.  The ironic part is the GameStop employee a) didn't know there was an Elite holiday bundle until I told him about it and he looked in the back and b) he told me I was getting one of the newer CPUs.

My guess is that Microsoft either sent out 'upgrade packages' or took all of their warehouse stock and inserted the holiday game case and slapped some new stickers on the box.  I have seen some Premium and Arcade systems that have visible lot numbers over 0739 (at Fry's) but I have also seen the double-tagged Premium systems (at Best Buy)- I guess it will be another month or two before all the Zephyr systems are gone. 

I guess I could return it but I think I am happy with this one; it isn't any where near as loud as the 360 Premium I returned a few weeks ago and it has all the accessories that I wanted (digital audio cable, 120GB HD, bonus games, etc).

As karma would have it I came across some closeouts 360 games at BrandSmart:

IMG_7369

Final Fantasy XI: $12.88
Enchanted Arms: $14.88
Battle for Middle Earth II : $14.88
Dead Rising: $28.88

Total bill for four 360 games: $71.52

10.24.2007

Way too early for me ...


At 7am, there are lots of parking spaces to choose from...

10.20.2007

My 'new' G4 Mac

A friend at work sent out an email at work saying that he was selling his G4 Power Mac; the price was good and I have been wanting a decent Mac for some time now. Before the day was out, I had purchased the Mac and brought it home. The first thing I did was take it apart (of course):

g4_inventory_00 g4_inventory_01 g4_inventory_02
64 bit PCI Slots (33Mhz only!) Dual CPU heastsink Heatsink + RAM
g4_inventory_03 g4_inventory_04 g4_inventory_05
Power and IDE 2+3 detail AirPort Card Interface HD 1 & 2 position under power supply
g4_inventory_06 g4_inventory_07 g4_inventory_08
Optical drive bays + system fan Optical drive bays - open Optical drive pays and HD 3 & Positioning
g4_inventory_09 g4_inventory_10 g4_inventory_11
Detail of HD 3 & 4 installation 120x120x58mm System Fan Speaker

I will say one thing for Apple; they spend a hell of a long time designing their cases; I am very impressed that I can remove a PCI slot cover without having to loosen the screw for the adjacent cover- a problem that I seem to have on every PC case I have ever used!

Other nuances include carefully routed IDE and power cables. The motherboard has three IDE ports- allowing installation of up to two optical drives and four 3.5" hard drives. So far I am content with the included 'super drive', but I replaced the 80GB drives (one stock from Apple, the other a previous expansion) with a 120GB Maxtor and a 250GB Hitachi drive. I also upgraded the RAM from 512MB to 1.5GB (and soon on to 2GB if I can find some more 512MB DDR DIMMs!)

I was driving myself nuts trying to get the IDE drives to be recognized for OS X installation; the drives are set on cable select and I was trying different drives/cable positions/jumper settings as they were not visible as 'available devices' during the OS X setup. I later found out that I need to go under 'disk utilities' on the main menu and partition the drives so the installer can see them! After I figured this out I had OS X installed in about 20 mins.

The drive cages are identical- so I can take drives 1 & 2 and change position with drives 3 & 4 without having to take everything out of the cages! I believe that the interface for drives 1 & 2 supports UDMA 100 while the other interfaces (optical drives and HDs 3 & 4) only support UDMA 66.

Today I took apart the Mac again and replaced the fans in the power supply- roughly following the instructions on the xlor8yurmac website.

The 60x60x25mm fans in my system were Nidec TA225DC (Model M34418-16) fans; these are rated at 25CFM airflow and 31dBA of noise pressure. I replaced them with some Link Depot FAN-60125-B fans from Fry's that are rated at 21.3CF and 27.8dDA. Not a drastic change in noise, but it does sound a little quieter than before (I believe one of the prior fans had a resonance going- now it is a more consistent hum).

g4_power_upgrade_01

g4_power_upgrade_02

g4_power_upgrade_03

New fans already installed in power supply

Old Fans with connectors cut off

Fans installed and ready for wiring

g4_power_upgrade_04

g4_power_upgrade_05

g4_power_upgrade_06

The magic of heat-shrink tubing

A little cable routing + zip ties

Detail of plugs

g4_power_upgrade_07

g4_power_upgrade_10


Cabling complete

Back to normal


I also tried the power supply insert suggestion- but it is very hard to tell if it actually helped.

g4_power_upgrade_08 g4_power_upgrade_09

a piece of padding to isolate the fans from the G4 case

Some scotch tape to hold it in place

Finally I installed a $15 USB card in the system to give me USB 2.0 ability; trying to sync my iPhone over USB 1.1 was going to take days! It silently installed in OS X and works great.

Future projects may include upgrading the CPU to a dual 1.8Ghz (currently a dual 867Mhz) or installing an AirPort Card; the later seems pretty useless as I have a 1Gbps LAN connection already. The former seems a little insane as this upgrade is in excess of $500- and for a little more I could get a used 1.8Ghz dual G5 system off of eBay! I would also love an iSight camera- but some places have this guy listed at over $500!